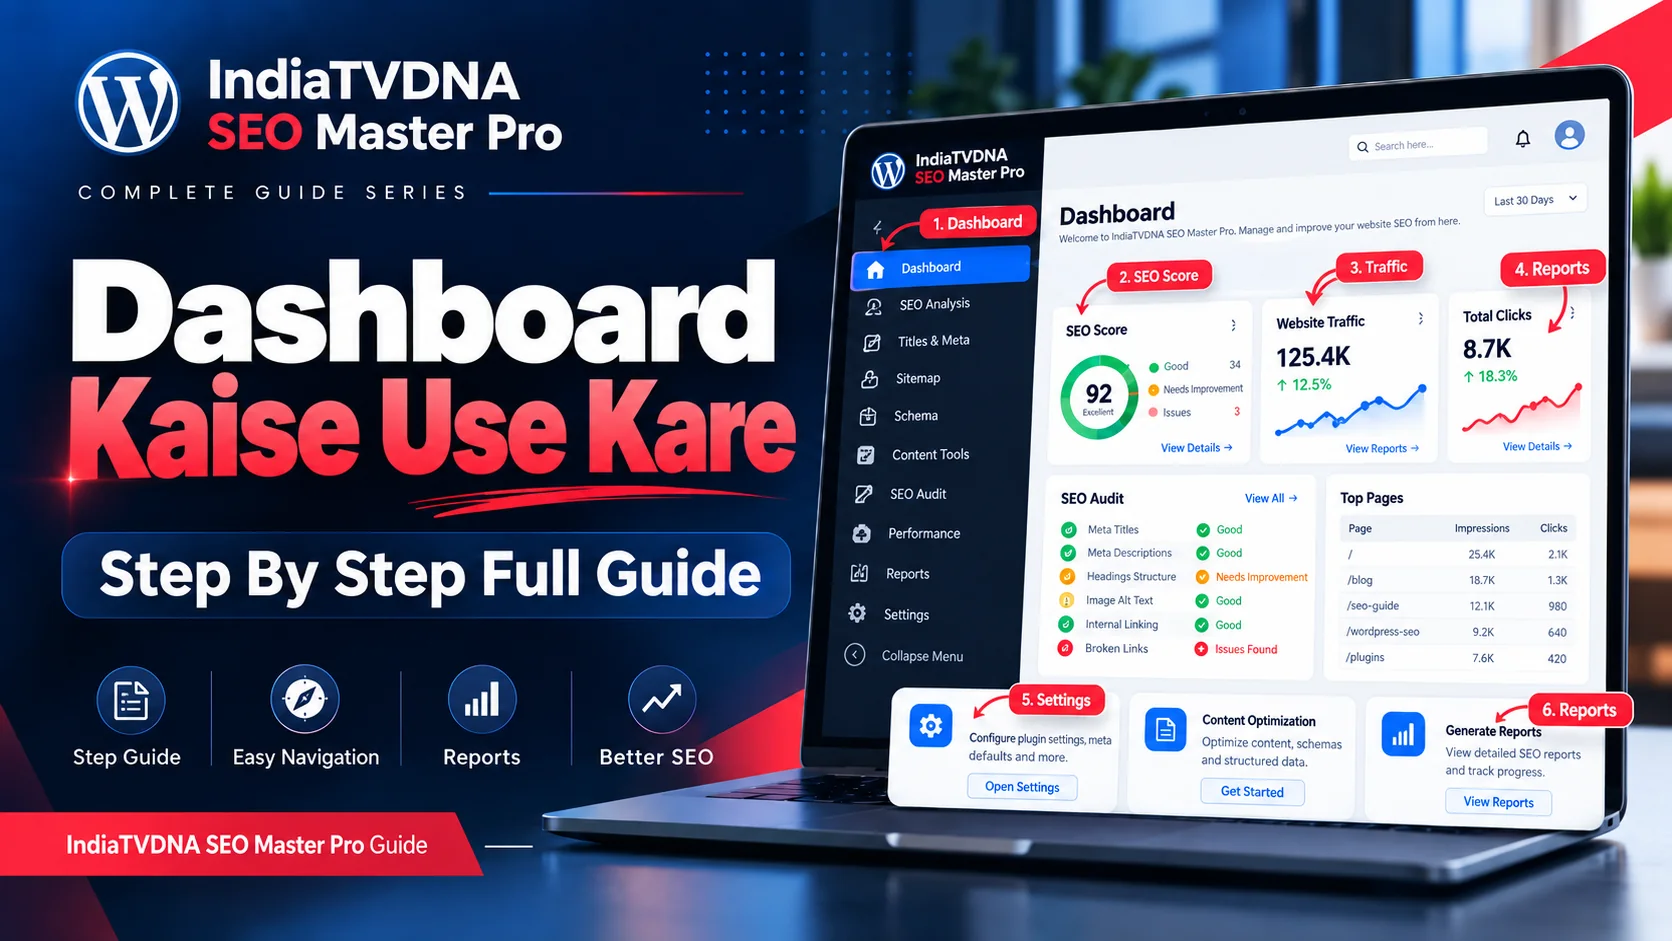
SEO Master Pro Dashboard को step-by-step use करने की practical Hindi guide: first scan, SEO issues priority, Search Console data, audit workflow, weekly routine और troubleshooting।
Dashboard को सही तरीके से use करने का मतलब हर card पर click करना नहीं है। Best workflow यह है कि पहले site health scan करें, फिर high-impact issues चुनें, उसके बाद संबंधित module में fix करें और अंत में frontend/Search Console से verify करें।
यह guide एक repeatable routine देती है जिसे आप नई site setup, plugin update, migration या weekly SEO maintenance में use कर सकते हैं।
1. Start करने से पहले 5-minute pre-check
Dashboard खोलने से पहले confirm करें कि site public है, HTTPS सही है और WordPress की accidental “Discourage search engines” setting enabled नहीं है। Search Console use करते हैं तो property access भी verify करें। Major SEO changes से पहले backup रखना अच्छी practice है।
- WordPress Reading settings check करें।
- HTTPS और canonical domain तय रखें।
- एक primary SEO output provider रखें।
- Backup/snapshot available रखें।
2. Step 1 — Overall status पढ़ें
Score के बजाय status distribution देखें: critical issues, warnings और good checks। अगर update के बाद अचानक errors बढ़े हैं तो पहले compatibility/regression investigate करें, content editing शुरू न करें।
- Critical → पहले।
- Warnings → context के साथ review।
- Good → unnecessarily touch न करें।
3. Step 2 — Indexing और crawl blockers देखें
Noindex, robots block, sitemap 404, redirect loop, wrong canonical या server error जैसी problems high priority हैं। Dashboard में संकेत मिले तो Sitemap, Robots, Redirect या Audit module खोलें।
- Homepage accidental noindex नहीं।
- Important pages robots से blocked नहीं।
- Canonical preferred URL पर जाए।
- Sitemap reachable हो।
4. Step 3 — Titles, descriptions और duplicate signals
Indexing ठीक होने के बाद important pages की metadata quality देखें। Missing title/description, duplicate title या canonical mismatch search snippet और page understanding को affect कर सकते हैं।
- Top traffic/important pages पहले fix करें।
- Duplicate titles में page intent compare करें।
- Global template के साथ important pages manually improve करें।
5. Step 4 — Search performance पढ़ें
Search Console connected हो तो clicks और impressions previous period के साथ compare करें। Impressions बढ़ें पर CTR गिरे तो query intent और snippet check करें। Clicks/position दोनों गिरें तो content decay, competition, indexing या technical change investigate करें।
- 28-day vs previous 28-day useful comparison है।
- Brand और non-brand queries अलग समझें।
- Top pages और top queries cross-check करें।
6. Step 5 — Audit issues batches में fix करें
100 issues एक साथ fix करने के बजाय similar problems group करें—जैसे missing ALT, duplicate descriptions या broken links। एक controlled batch fix करके re-scan और sample verification करें।
- Small controlled batch से शुरू करें।
- Bulk change के बाद random samples test करें।
- Unexpected result हो तो rollback करें।
7. Step 6 — Schema और rich-result readiness
Schema warning दिखे तो सही schema type सही page पर लगा है या नहीं देखें। Product schema blog post पर और Article schema product page पर force नहीं होना चाहिए। Required fields real content से भरें।
- Schema type page purpose से match करें।
- Duplicate schema providers avoid करें।
- Rendered JSON-LD validator में test करें।
8. Weekly SEO routine बनाइए
सामान्य site के लिए weekly dashboard review, monthly deep audit और major update के बाद verification practical routine है। High-change news/ecommerce sites अधिक frequent monitoring कर सकती हैं।
- Weekly: health + traffic trend + critical issues।
- Monthly: full audit + duplicates + internal links।
- After update: sitemap, schema, metadata और key pages sample।
9. Troubleshooting: Dashboard data empty या stale लगे तो
Search Console authorization, cache, cron/background jobs, plugin conflicts और database health common कारण हो सकते हैं। Dashboard summary और actual frontend output disagree करें तो frontend output को प्राथमिक evidence मानें।
- Cache purge करें।
- Integration permissions verify करें।
- Feature Integrity/Health tools हों तो run करें।
- Server logs या REST/API errors check करें।
10. Final practical workflow
हर session में एक verified action पूरा करें: issue चुनें → root cause देखें → safe fix करें → frontend/external platform से verify करें → result note करें। यही Dashboard को useful बनाता है।
- Issue choose।
- Root cause confirm।
- Safe change।
- Verification।
- Next-review note।
Frequently Asked Questions
सामान्य site के लिए weekly review पर्याप्त हो सकता है; major update या migration के बाद extra check करें।
नहीं। Intentional noindex/archive rules context में सही हो सकती हैं।
पहले trend, query/page data, indexing और recent changes diagnose करें; random changes avoid करें।
- IndiaTVDNA SEO Master Pro Dashboard क्या है? SEO Score, Audit, Traffic और सभी मुख्य Controls की Full Guide
- IndiaTVDNA SEO Master Pro Quick Setup कैसे करें? Blog, Business और WooCommerce के लिए Best Settings Step-by-Step
- IndiaTVDNA SEO Master Pro XML Sitemap क्या है और SEO में क्यों जरूरी है? Crawling, Discovery और Indexing Full Guide
Leave a Reply